Showing posts with label Adepticon. Show all posts

Monday, September 24, 2018

What to do with hotel key cards...scatter terrain

You are back from your latest road trip to the gaming convention, be it AdeptiCon or NOVA Open or GenCon and you have a couple of those little hotel room key cards still in your pocket. Well you could throw them away...or you could upcycle them into bases for scatter terrain.

Living in Florida, I thought the first thing that I should put together is something with an orange tree. The basic requirements are a hotel key card, some Alene's tacky glue, Woodland Scenics Scenic Cement, Woodland Scenics Blended Turf, and a Woodland Scenics Woodland Classics Orange Tree (N, HO, O Scale).

The process is pretty straight forward and this little project should not take too long to complete. Start by locating your tree. Depending on the size of the tree that you use, you can get one to three trees on a card. I started with an easy piece for the first go and selected a solitary orange tree. Glue the tree base into the desired location and let dry completely. I didn't scratch off the surface of the key card, but may in my next go to see if the adhesion increases. I did leave the tree together when selecting the placement since it is a good guide to see the canopy of the tree.

Once set, I watered down some of the scenic cement with water to make a spray adhesive. Remove the tree from the tree base for this part. Spray the entirety of the card with the watered down scenic cement. When covered well, you will then sprinkle on the blended turf. I used newspaper as my work surface so that I could recover any turf that did not adhere to limit any loss.

After the first layer is added and had some time to dry, shake off the excess onto the news paper. Now repeat the process for additional layers. I ended up with four applications of spray cement and turf to get to the coverage and thickness that I though necessary. Once you have the coverage that you desire, apply at least one more coat of the watered down scenic cement to the surface and reattach the tree. With play, you will get additional loss but reapplication of the blended turf is quick and easy.

Wednesday, March 9, 2016

Lost in the Apocalypse!

Wandering the Wasteland


I can't believe that I have let so much time go by without a post. I promise that I have been busy, but almost everything I have it packed up waiting for us to sell our house and make the move to sunny Florida. But enough about that, let's talk about some exciting things that are currently happening...

This Is Not A Test Kickstarter is LIVE!!!!!


Help us create a beautiful hardcover edition of the This Is Not a Test: Post-Apocalyptic Skirmish Rulebook. Game at DEFCON Fun!As any of my readers know, there has been a steady campaign of This Is Not A Test occurring over the last many months. Now there is some other big news for This Is Not A Test...a hard cover rule book. Just launched last night, the campaign is blown through the $2,000 goal in 10 minutes and in the first two hours was at $7,000.

I was excited for this for a number of reasons. First it is a fantastic and fun game and one that I look forward to playing for a long time. Second, Joey gave me some ability to help out with the game. Now I have done it mainly for support, to gain some experience, and fun up to this point. I edited one release already, but with the Kickstarter; I have a full set of scenarios titled, "Eat, Prey, Live" which was unlocked at the $2,500 pledge level.

If you haven't been part of the group following my Guardia along on as they protect this small piece of the wastelands, please check it out.

Building and Sculpting

As part of the lead up to our move, my wife has been travelling back and forth to Florida as she fills her new position. This with the need to keep the house show ready has caused a decrease in the amount that I can accomplish for my hobby.  This post will be the fist of a series where I explore some terrain building. I picked up the Bachmann Trains Cape Cod House 2-Box ($19.29) and the Bachmann Trains Two Story House ($21.40) from Plasticville and will go through my process for assembly with some lessons learned.

One day we were stuck in a blizzard (won't miss that in Florida) and got to spend the day doing some hobby stuff with the kids, so there is a post coming on how to build some shanty shacks. With two kids, I had prepared ahead of time to make sure that we had some hobby materials on hand to have some fun and break up the day. I'll share the step-by-step on this as well.

On a completely new front, I decided that in support of the "Eat, Prey, Live" release, I decided to take up sculpting. The first things I took on though were objective markers for some scenarios with everyone's favorite wasteland critter, the landsnapper. I created a set of markers of landsnapper scat, a prized possession of the wasteland and useful for fuel of many types. I also created a set of landsnapper nests with eggs that will be used for something. Not sure what yet, but something...maybe something tasty. The newest project though is a Turclucken.  Want to know more about that, you'll have to wait until the Kickstarter is done and the scenarios are released.

Gaming with Kids

Growing from the blizzard, was a desire to play some new and more complex games with the kids. The first of those that we tried was Cool Mini or Not's Zombicide ($58.69). We managed to make this a family affair and I'll provide my recap of the game and reviews by me and the kids.

Coming soon

Well it is coming to be that time of year again, AdeptiCon! Once again, I am making the trip with the good folks of Geek Nation Tours. Looking forward to spending some time helping run some Couterblast demos, playing some This Is Not A Test, and helping Secret Weapon Miniatures and maybe Ironheart Artisans will sales. I also have a few pints to drink and am really looking forward to a game of Imperial Assault. If you find yourself at AdeptiCon, please take a look for me. I'll be all over, but would love to spend some time chatting and making new connections.

So that's all for tonight, back to watching the excitement!


Wednesday, November 18, 2015

This Is Not A Test: Marshal's Report: Search and Recovery Operations

The following are the Marshal's reports of recent occurrences of peacekeeper activity from events at or near to Games & Stuff in Glen Burnie, MD. All reports are provided directly from the surviving ranking officer and are considered accurate and true. 

Marshal's Report


Search and Recovery Target - Relic Vehicle

Unexplored Ruins - Search and Recovery

Reported by: Marshal O'Halihan
Date: October 21, 2086

Unit Details

Marshal O'Halihan
K-9 Handler Mutt
K-9 Units Dawg & Cagney
Officer Manny
Officer Flynn
Officer O'Brien
Officer Scullin

Activity Report

During some downtime in one of the regularly patrolled settlements, the Gardia were approached by a wild haired, rambling, older gentleman dressed in some sort of laboratory coat with an offer. He stated that he had located a relic, but was unable to recover the item and was looking for a group to recover the item. The item, a relic vehicle of some import, was located about 2 km to the west on a long-abandoned small town main street. Marshal O'Halihan agreed on a price and accepted a contract from the gentleman.

Mutants pressing through the ruins
Because of the number of buildings located in the area, Marshal O'Halihan utilized a spread formation to approach from two separate directions. Sniper Manny, Officer O'Brien, and Officer Scullin approached from the northeast corner. Manny had previously scouted out a ruined building that he could use to provide support fire so the officers could approach and secure the relic.

At the same time, Marshal O'Halihan approached from a small copse of trees on some small hillocks with K-9 Handler Mutt and K-9 units, Dawg and Cagney. Supporting the, was Officer Flynn. The approach was a funnel, but offered some higher ground where Officer O'Brien and Dawg could provide cross fire with Sniper Manny.

Gardia securing firing arcs
Not long after starting the approach, Sniper Manny noticed a lone caravanner approaching from a distant heavily wooded area in the southwest of the town. When he was able to get the caravanner in focus, he was able to identify him as Sven of Killee's band. With a quick shot, he caught Sven by surprise and was able to send him scrambling for cover. After this an additional caravanner made a hasty approach toward the location of the relic vehicle.

It was quickly apparent that Killee's caravanners were in the area for the same reason as the Gardia, to recover the relic vehicle. As with many things in the wasteland, success is not guaranteed and as insurance the old man had hired another group.

Caravanners moving to secure relic
Mutt sent the K-9 units forward to engage, but when Cagney went to spring from the wooded hillock, she was wounded and could not go further. The set of mutants that Killee picked up a few weeks ago quickly moved through the ruins to try to secure the vehicle and make off with it. Marshal O'Halihan was able to quickly mark the mutant, Stop, and put him out of action. At the same time Officer Flynn caught Pots with near-hit and sent him scrambling for cover.

Quickly the rest of the caravanners made headlong for the relic in an attempt to overwhelm the smaller Gardia force. Sniper Manny was able to quickly put Sven down in the woods to keep him from the engagement. The other officers, Scullin and O'Brien made approach to the relic through the ruins to create firing arcs to prevent the Caravanner advance.
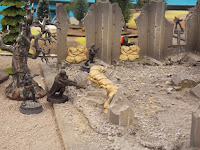
Gardia approaching through ruins
Marshal O'Hallihan and Officer Flynn took up locations at the tops of the hillocks to use the tree coverage and provide additional firing arcs to prevent Caravanner advance. Marshal O'Halihan was able to quickly Ms. Perfect as she returned fire from the corner of the ruined building. Marshal O'Halihan proved a better shot and put Ms. Perfect down. Killee opened up on Officer Scullin with her submachine gun, but none of the three shots were sufficient to penetrate the officers armor.

The caravanners continued the all out press toward the vehicle, taking up second story positions on the building at the southwestern corner at the vehicles location. Marshal O'Halihan took advantage of the close proximity of the caravanners and was able to quickly hit Mrs. Argyle, Swifty, and Mr. Flash. Where Swifty was wounded, the other two were downed and out of the engagement. Officer Flynn was able to put a shot on Mrs. Stuffings, but it was just a grazing shot and she went to cover but was not wounded. ant
Gardia eliminating caravanner rush

Officer O'Brien was able to keep Black Widow pinned down in the woods to keep her out of the engagement while Sniper Murphy was able to eliminate the mutant Pots that previously fled the engagement. These last actions effectively eliminated the potential for the caravanners to continue the engagement and with the loss of overwhelming numbers and at a tactical disadvantage, Killee withdrew her group and abandoned the vehicle. The Gardia cannot determine the nature of the vehicle as it appears to be some high technology that would risk obliteration if activated. If that was even possible still.

Post Activity Update

Midpoint Algoryn AI Squad Figure
When the Gardia salvaged the Depend O'Bot ($6.50) in the Wasteland encounter, I immediately purchased two from This Is Not A Test. But with the combination of personal things and pre-registration for AdeptiCon 2016, I went back to the Liber Metallica Seminar with Dave Taylor I had taken. With this seminar, we received a Warlord Games Gates of Antares figure, specifically one of the Algoryn AI Squad figures ($32.00 squad of 5 metal figures). This seemed like a good figure to use and it had the bonus of already being assembled and primed.

I decided to implement the Liber Metallica method with this figure so I started with by coloring all of the metal components with Vallejo Gunmetal Grey. This was the darkest of the gunmetal type paints that I have. I followed this immediately with a wash of Secret Weapon Miniatures Soft Body Black Wash ($2.99). Now one of the important aspects of this method is to repeat color with washes to change the tone color up and down as you go, remembering that the light is coming from above.
Finished Algoryn AI Model (Front View)

I tried very hard to keep the color scheme to a very limited palette. To deepen the spaces between the armor plates, I lined with Vallejo Black Ink. The cables were painted with Vallejo Black Grey and then washed with the Soft Body Black again. The gun was based with Vallejo Black and then there are touches of Vallejo Tinny Tin to give it a little pop. Who doesn't want a gun with a little pop.

Finished Algoryn AI Model (Rear View)
He has a series of belt pouches and a jet pack on his back. I decided to give these a little color to break up all of the shades of black and grey. The base color for the pouches and backpack was Vallejo Dark Red. This is a really flat red and not really dark or deep. I layered above on the elevated surfaces of the backpack with Vallejo Flat Red. The vent for the jet pack got some touches of Vallejo Gunmetal Blue to give it a little of the heated metal look. The belt pouches were limited to the dark red. I also gave some touches to the face and the emblem on the shoulder pad with the dark red.

Now all of this didn't provide any highlights on the figure. To achieve that, I went to the Citadel Chain Mail. This is a lighter silver color. I applies this to the exposed surfaces of the figures, trying to imagine those parts that would get the most light and therefore be the brightest/most reflective. While it is entirely clear that I need some more work on tackling this technique, I am happy with the results and this will make a nice addition to the Gardia.

Achievement Unlocked!

Bronze Bombardier Award
With all of the goodness at Bombshell Miniatures, it hardly seems appropriate to get recognized for supporting them. Last week though, I received an unexpected package from Bombshell. Inside was great looking pin and with a certificate indicating that I achieved the Bronze Bombardier Award for my continuing level of  support. In addition to this was a very nice hand written note from Patrick Keith thanking me for my continued support and help with spreading the good word on his materials. So my thanks to everyone at Bombshell Miniatures for the great stuff they produce and I look forward to the challenge of achieving Silver and Gold levels!


Sunday, November 15, 2015

Liber Metallica with Dave Taylor

AdeptiCon Seminar - Painting Metal

Extreme Range from Light to Dark
With AdeptiCon 2016 fast approaching (pre-registration starts 11/23) and a recent win in This Is Not A Test landing me a free Depend O' Bot ($6.50), I wanted to finish a post I started after AdeptiCon 2015. If you find yourself at a convention that offers seminars, you should take a hard look at them. Many conventions find amazing talent to provide a wide array of seminars or hands-on experiences to gain new skills or to see the approach the instructor takes. In this instance, I took Dave Taylor's Liber Metallica seminar. (While you are on Dave's sight, be sure to check out his latest project - Building a Titan, a Legio Crucius Warlord Titan) As it happens, this will be offered again a few times at AdeptiCon and if you have ever painted up figures, this is a helpful course. Though the focus is on metal figures, there are important discussions that cross over to any miniature.

Top Lit Bronze Statue
The basic premise of the course is understanding how to work on a model from the top down to provide the right lighting scheme for the model. During the course, Dave took us through some basic concepts of lighting and used a fantastic slide deck of images that demonstrated what he was saying. For each image, we walked through the image itself and the lighting of it as well as dissecting the color range/spectrum used as well as the color palette used. Not being an art major or aficionado, this was very helpful to me to learn more about color theory and spectrum. If you don't have a color wheel, it is a good investment if  you plan to use color theory for your painting. 

One of the main take aways from the class is to prepare the lighting from top to bottom. As if the light were coming down from above the model. As Mathieu Fontaine says light to dark from top to bottom. Matt works in spheres. Think of a sphere where light is on top, The brightest spots are on top and the darkest is underneath. If you break your models down into spheres and manage light/dark in the same manner for each section the end will capture the same lighting effect though the entire model. The bronze statue image shows this well, where the light source is from the top so the peaks at the top are the brightest then transition into midtones and darker tones quickly. 

Garden Sphere Sculpture Vatican
With highly polished metallic it is also important to recall that the metal should reflect the environment around it. To accomplish this, use shades on metallic surfaces (polished steel/silver) to reflect environment. Shadows of bright/polished metals will have shadows hued from the environment. In the image below of the sphere sculpture, you can see how the super high mirror finish of the silver sphere reflects the surrounding environment entirely. Even with this highly colorful sphere, you notice that the top is essentially white where the light strikes the sphere and the bottom where the sphere touches the garden goes to nearly black. 

Liber Metallica Miniature
During the seminar, Dave does specific coverage of painting steel/silver, gold, and bronze finishes and you get a chance to practice this painting style on a miniature. For the practice miniature, we got a great robot soldier model, I don't recall the producer. I have had this model sitting around since AdeptiCon 2015, but not taken the opportunity to paint it up fully. After a recent This Is Not A Test game where I managed to recover a Depend O' Bot in the post game and the upcoming pre-registration (I'm already registered through Geek Nation Tours), I saw a great opportunity to finish this model and post up about Dave's seminar. 

Liber Metallica Miniature
Unfortunately some unexpected events have occurred over the last couple of weeks which has prevented me from getting much painting done. The facility my wife was running was sold, which was not unexpected; but the sale was delayed twice and she ended up with lots of requests that kept her at work for 2 straight weeks. Add to that death of my grandfather and not much painting got done. I expect all of that to change very soon though and to see lots more production again. 

Seminar Bonus: Dave provided to us his super secret metal wash in a handy dropper bottle. And because he is such a great guy, he gave us the super secret metal wash formula as well. Dave uses this wash for a wide variety of applications, though large metal is a different process. I may attempt to take that class during AdeptiCon 2016. The exact details of the wash are missing, but you can play with the volume of each to get the desired wash you like.

Supper secret wash
  • Charred brown
  • Vallejo black (game color)
  • German camp black brown (model color)
  • Water and matte medium

Wash over metallics can dull sheen. Go back to highlight to bring back up to desired level.

Bonus tip: For items such as gems, sensors, and lenses; paint them up using the above described process then use layers of successive coats of gloss varnish. When you reach the desired level of shine on the gems, stop. Make sure to allow the varnish to dry completely between each layer.

Wednesday, November 11, 2015

Time for some dumpster diving...then shooting people

Time to get dirty with Secret Weapon Weathering Pigments in the Reaper BONES Dumpster

I covered modifying the Reaper BONES Dumpster ($4.99) so that the lid stayed open in my Reaper Miniatures Halloween Tricks and Treats! post. So let's take a look at the next steps to making this ready for tabletop use or for a diorama.


In the Baltimore-DC metro area, our trash services are managed largely by Waste Management. This company has a trademarked look which is green dumpsters with the logo on the front. The spur to purchase this dumpster was for added scatter terrain for This Is Not A Test which takes place here and the surrounding area. I immediately went to the interwebs to find more on these ubiquitous and often overlooked waste bins. I thought it would be too weird to be out and about taking photos of dumpsters, which is what I would normally do for other pieces. So move along with a search strategy.

Painted Dumpster
Now, I am color blind (red green) and making a perfect match isn't exactly possible for me and I decided since it was scatter terrain decided that I didn't need the wife or kids to get me the exact color match in the number of green paints that I have. I went with the U.S. Dark Green from Vallejo Model Color. The lid was painted up with a standard black, again the Vallejo Model Color paint.

Finished Dumpster (Right Front)
Now that the base colors have been done on the dumpster it is time to make it look like a real world dumpster and not a brand new one. So off to the set of Secret Weapon Weathering Pigments to get started. If you have not taken the opportunity to use pigments or would like to know a bit more about how they are used, you can read more about them in my Hands-on Weathering Pigments with Mr. Justin post from AdeptiCon 2015. I spent a good amount of the last AdeptiCon helping out at the Secret Weapon booth and was able to realize the entire set of weathering pigments as a result and am just really getting into the use of them, but now can't wait to see what I can do next. For all of my application, I used the additive method for weathering.

Finished Dumpster (Left Rear)
I didn't take any in-process pictures of how I got to the end with the dumpster because that would simply be too many photos to try to post and describe. I did though take a set of photos that show all of the sides of the dumpster and the interior and will go through what was done on the various surfaces.

I started with an idea that any dumpster left unattended will end up on fire, I think that is one of the thermal laws. I didn't want to make the entire dumpster look like it was on fire, so I focused on the left rear corner of the dumpster. To give it the burned look, I started with the Exhaust black and made burned areas on the exterior and interior corners. I tried to make them cover the same space on both sides. This gave the base for the burned area which I went back to with the Ash Grey which is necessary to give the difference in the heat marks and adds depth to the weathering. The Ash Grey is first rubbed onto the area and then stippled on to leave some texture to the weathering.
Close-up Interior Fire Weathering

Next on the process was to add rust. The second law of thermodumpsternamics is that all dumpsters are rusted to some level. For the future wastes, it is more than other spaces but I couldn't just coat the entire thing in rust because it may get life in other games as well specifically the upcoming Jupiter City Marvel campaign.

For the rust effects I went mostly with the set-up that Justin covered in depth during the weathering seminar. The base color was Rust Brown. For the most part I applied this almost like a paint because it was deep rust but I didn't want a lot of texture. One thing I did do though was to load up the brush directly on the side of the area to be weathered. This allowed some of the pigment to fall to the base as would happen with flaking rust. The next level of the rust up is Rust Orange. This is slightly less old and immediately gives a lot of depth. I applied this as a mix of brushing and stippling to give it some varying texture and depth. The final pigment is to give it the "new" rust look in smaller areas. This is done with Dark Yellow. This is almost entirely stippled onto the area with little to no brushing. You can also hold between your thumb and middle finger the loaded brush above the area then tap with your pointer finger to apply the pigment in a random spread area.
Finished Dumpster (Bottom Interior)

It important to remember that rust runs with water, so in areas where the water would run off and down, the rust should follow along. To do this start with the deepest color (Rust Brown) then drag down along the water line. Follow that up with some of the Rust Orange at the location where the water may accumulate and along the edges. The Dark Yellow can be dappled around it for those hold out locations.

For the interior, I added some of the Rust Red to the walls to add a bit more depth and to mix up the brown/green rusting. For the floor interior it was necessary to have some dirt. I mean what dumpster doesn't have at least a little dirt in it. I applied the Rust Red as the Rust Brown on the interior so that both fell to the bottom as well.  To add a little more depth to these, I included some Dark Earth sporadically across the floor to break up the Black base color. The colors in this photo are much brighter than they appear in person, but that is from the LED light that is on them.

Close-up Interior Floor Rust/Dirt 
When all of the weathering is done, follow the following application method to fix the pigments to the dumpster. Load up a brush with the Pigment Fixer. I used a square acrylic brush. Then just touch the flat side of the brush to the area. The light touch will allow the fixer to flow from the brush to the area by gravity feed. Applying too much may cause the pigment that is there for texture to move, but it usually isn't too bad. After applied it takes about 20 minutes to dry unless it is thick. Where the fixer flowed down to the bottom of the dumpster it took a little longer. I am not sure how long because I went to bed while it dried.

I am quite pleased with this Dumpster and am looking forward to many, many more projects to use these pigments and to try some others for comparison, specifically the products offered by BrokenToad. That will be coming soon with some Car Wars Mods...it's time to start thinking about my Geek Nation Tours trip to AdeptiCon 2016 after all.

Sunday, October 11, 2015

Building a Titan, a Legio Crucius Warlord Titan build by Dave Taylor Miniatures

Dave Taylor Miniatures: A Production Studio

Legio Crucius Warlord Titan by Dave Taylor Miniatures

Background 


Dave Taylor has been wowing us for many years with his abilities be those in developing game content, modelling, painting, putting together articles and photo layouts. He has been a stalwart supporter of the NOVA Open Charitable Foundation with donations of time and energy to countless armies.
'Mars-Alpha Pattern Warlord Titan
Mars Pattern Warlord Titan

I've had the pleasure of knowing Dave for a while and what can I say he is a great guy and strong supporter of the community. I took the opportunity to take his Liber Metallica class at AdeptiCon which was fantastic. I'll be implementing what I learned there as soon as I get my act together.

Dave is looking to expand what he can do and provide for the gaming community. To achieve this goal, he has started a new and grand project to build and paint a Mars Pattern Warlord Titan. Dave will be exploring and experimenting with really powerful magnets, airbrushing, and creating/applying custom decals. He will share this process while also experimenting with a number of platforms including YouTube video sessions, Facebook posts, Instagram photos, blog posts, and Google Hangout chats. Some of these are entirely new areas for Dave, so we will be learning along the way. You can join along for the ride and help make this possible by supporting his Patreon campaign which you can read about in the Supporters section below.

The project is expected to take approximately 6 months, so you will get many insights to how someone of the talents of Dave approaches a build of this scale, selections of palette and process for painting large scale and detail. No doubt there will be countless and valuable tips for your own hobby work and with the level of interaction proposed by Dave, there will be plenty of opportunity to discuss everything in detail to increase the benefits for everyone.

So far Dave has posted up two great videos for the project with additional videos to be posted as he goes along. You can see more information about the number of posts and videos which increase as his support increases. I've included the first two video posts below so that you can take a look at some of the content that already exists and have an idea of what will be coming later.


The first video (above) is on the background and start of the project and includes a thorough unboxing of the many boxes included in the Forgeworld shipment. In the second installation, Dave covers the process for separating the resin pieces from the cast blocks including a walk-though of the tool selection, cutting and filing of mold lines. He goes on to handle how to process the pieces and prep them for assembly and painting steps.


Build associates


Fallout Hobbies
Fallout Hobbies - Ron Gamble at Fallout Hobbies has signed onto the build to provide custom decal sheets. I had the chance to spend some time with Ron at NOVA Open this year and picked up a few of his decal sheets. Not only does he have a great stock set of decal sheets, he will help you develop any custom set of decals for your personal or business use. I have a plan in place to have custom pin-up decals created, once I get my wife on board, for use on my air support. Prices are incredibly reasonable, especially for the custom sheets which come in at $35 for the first with the design help and then $15 per sheet thereafter. Definitely check out his site and support him as well. As a bonus if you become one of Dave's regular supporters Dave and Ron may help you design a custom set of decals for your use.


The Artillerist
Full Borer Miniatures - Chris Borer has signed onto this build and will be sculpting up a new crew set to man the Warlord Titan. This will be the second pairing of Chris and Dave and the previous match was for a NOVA Open Charitable Foundation army which brought us The Artillerist. The Artillerist was designed as the Master of Ordinance for the Steel Legion Imperial Guard Army that Dave painted up. I have this miniature and will one day get it painted up, but you can see the quality of this piece. For a fully painted version and more on the history of the piece, check out The Artillerist gallery.


Secret Weapon - I've long been a fan of the work done by Justin and crew at Secret Weapon. I spent a lot of the last AdeptiCon helping out at the Secret Weapon booth. I also took a weathering pigments seminar with Justin, which was really fantastic. Secret Weapon will be providing the base for this Titan Warlord. Need a base for any of your projects, well Secret Weapon has 875 different base options.

Supporters


This is not brought to you by the letter N and the number 5. All support is provided by YOU! and me and the rest of the gaming community.  This is a rather large project and as such will require quite a bit of time and effort and to help defer the costs of all of that, Dave has set-up a Patreon site where you can support the build.

In return for your support, you can get in on some great video blogging on the project and open communication about the project with Dave and the rest of the supporting community. Now this isn't your local PBS or NPR station, so no mugs if you support, but there are some great rewards for your monthly patronage. Here is the information for each level provided you support each month through the end of the campaign.

  • $5 - Name painted on the titan and a small decal sheet from Fallout Hobbies
  • $10 - Dave will help you create a custom Fallout Hobbies' decal sheet and the previous
  • $15 - Invitation to the bi-weekly Google Hangout and the previous
  • $20 - One Titan crew member miniature by Chris Borer painted by Dave and the previous

Now, I know you don't think it could get better, but it does. There are also monthly support thresholds built into the project. So if monthly patronage gets to

  • $300 - Increase to 3 videos per month and 6 blog posts
  • $600 - Increase to 4 videos per month and 8 blog posts
  • $1000 - Increase to 6 videos per month, 10 blog posts, and build a shipping crate for the Warlord!

Wednesday, August 26, 2015

First in (style)...the Secret Weapon's 6x6 Rapid Assault vehicle

Secret Weapon's 6x6 Rapid Assault Vehicle


Secret Weapon Miniatures has long been a go to place for resin bases, they have a large variety and every style and size imaginable. Secret Weapon also has a fantastic line of washes and weathering pigments (Hands-on weathering pigments with Mr. Justin blogpost). But today, I am going to review the single vehicle kit offering, the 6x6 Rapid Assault Vehicle.

6 x 6 Rapid Assault kit contents
I purchased this after my many looks and considerations and after spending nearly an entire weekend hanging at the Secret Weapon booth at AdeptiCon. The kit contains 21 pieces which are a mix of resin and metal castings.

The hull is comprised of two main parts. The hull bottom has two quite large resin parts on the back, so you may want to have a saw at the ready. The bottom part has two hatches in the rear and components for the suspension for each wheel.

Hull top (detail view)
The hull has a lot of detail to it as you can see in the top hull image. Along the top and sides are a number of hatches, tools, vents and other details. There are also two ports to the rear of the right and left sides for gun ports. The top half of the hull has a whole to seat the turret. There is an elevated ring around the turret seat that hides the turret seating. The top of the hull has a square hole for the hull gun. There are two options for the hull gun, a machine gun or a flamer. The fit isn't super snug, but solid enough that you could easily add magnets for weapon swaps without any concern for wiggle.

Turret (detail view)
To assemble the hull, you first should attach the wheel hubs to the lower hull portion. The hubs have notches that will allow them to slide down onto the suspension components and fit rather snuggly. If you try to put these on after assembling the top and bottom hull pieces, you will have a lot of difficulty. The top hull half has small rounded buttons that seat into the cups on the top of the bottom half of the hull. The exhaust system fits flush to the rear of the top half of the hull. There are two pipes that will line up when correct. There is also a plate location that will be facing up when the exhaust is attached.

The turret assembly is a single piece with a notch for the main gun assembly. The turret has a small amount around the base that needed to be trimmed, but as with the rest of the rest of the resin components, there was very little clean-up necessary. There are six (6) different options for the main gun. The main gun could be an autocannon, multi-laser, plasma cannon, flame cannon (heavy flamer), heavy support cannon (mortar), machine guns, or a high velocity cannon. The turret guns don't quite fit as well as the hull gun, but the fit is good enough that you could magnetize all of them for quick swaps. The turret guns have some flak that will need to be removed as with any metal cast.
Main gun options...6 of them!

The wheels fit onto the body with a spoke into a whole design. The fit for each varies, but with some adhesive it won't matter. This is a fixed wheel design. The wheels have rims cast onto them. The tread pattern is a diamond shape and adds sufficient texture to finish the wheels.

This kit is a very solid and has a great deal of detail. I purchased this as an attachment to my Imperial Guard (Astra Militarum) army and to go with my Elysium vehicles that were purchased at AdeptiCon. This kit can be used in any number of games, but for now I plan on using this as a Chimera variant.

Thursday, July 16, 2015

A place to keep my Promethium

Promethium Depot

Background

After AdeptiCon, I knew I would be adding more terrain to my collection and working on a themed table of some sort. I didn't know what it would be until I started reading the Gaunt's Ghosts novels by Dan Abnett. I haven't been reading them in any specific order, but am starting to line them up for that purpose now. The idea I had was born from reading The Armour of Contempt (e-Book $11.99). In this Gaunt leads his Ghosts back to the Chaos tainted world of Gereon a former Forge World where they go through a trench-ridden Munitorium that has been corrupted thoroughly.

My idea though combines the horrors of Dan's novel and the fantastic scenery pieces produced by Alex at Ironheart Artisans. My idea is to create a Promethium depot that is tainted and corrupt. This will require a number of the Fuel Storage units, the Promethium Pipes ($37) sets built on and around the trench system. More on this build as I get started, but first up...a place to store the promethium.

Ironheart Artisans' Fuel Storage

Fuel Storage Can
I started with the single can fuel storage unit kit ($19)...can what you I mean can, well the kit is laser-cut MDF that forms around a 12 ounce aluminum can. What the can formerly held is up to you, but in my case; I had an A&W root beer can that was emptied and cleaned the night before. Beer cans weren't available, mostly because I typically drink bottled beer, but please enjoy responsibly.

Fuel Storage Kit
You can, should you desire additional weight, use a full can. If doing this than I can only recommend using the highest level of beer, Coors Light, as terrain may be the only valuable use for this "beer".

The image here shows the entire contents of the kit. This kit as with all of the other Ironheart kits does not have to be glued together. I decided that this would be a frequently used piece of terrain and I have ample storage, so I glued the parts together using Aleene's Wood Glue.

The entire kit is well thought out so that each of the pieces fit snugly, which is why you don't have to glue. While the assembly is straight forward and pretty easy, I created a step-by-step walk-through and pictorial of the process I used. Surely some of the steps could be done in a different order.

Stairs/Walkway

I thought it best to tackle the assembly in separate parts and then assemble them all together at the end. Since the stairs/walkway were the most complex part of the build, I started there. This part of the kit definitely takes a little patience. The stair runs fit well into the riser as does the walkway. As you can see in the top view image, the walkway has added texture with the cut-outs to make it look like steel decking. What you can't see in the images so clearly, is the texture built into each of the stairs as well. These each have some etching to make them look like steel steps as well.

Half-assembled ladder (side view)
Half -assembled ladder (top view)
I started by gluing the walkway while holding the riser in my hand. This fits perfectly to the riser and is rather secure when fit together. I then laid the riser down and glued each of the stairs to the riser. There is a little peg at the end of each stair that fits well into the associated hole in the riser. There are a number of lattice cuts in the riser, so gluing surface is reduced but more than sufficient to hold everything together. Apply a little glue to the end of each stair and put in the hole, making sure that the etched side is facing up.

Completed ladder/walkway assembly
Once the stairs are added, give the piece a minute or two for the glue to start setting. Add some glue to the other side of the walkway edge and the edge of each of the stairs. Since the kit is so snug, here is where you may need a little patience. Fit the walkway to the other riser then you will have to work your way down the stairs. While keeping pressure on the walkway with one hand, fit the pegs of each stair to the appropriate hole in the riser. This will go pretty quickly if you are applying just enough pressure to hold the piece together, but not so much as you can't move the stairs. I worked on alternate sides until I got to the bottom. As you can see in the finished image, you have a very nice ladder piece and landing which is stable and appealing.

Top access hatch

Top access hatch (top view)
Top access hatch (side view)
The next separate part is the top access hatch. The hatch body is composed of four pieces that connect to each other with a tab and slot system. Apply some glue to each of the ends and simply fit together. Once the base is assembled, the top can be added. I applied the glue to the base and then added the top. The hatch portal component is a separate piece and there is a nice outline where it will fit. There is added detail to his for bolts/rivets which hold the completed piece together.

Front/Rear tank assembly

Front/Rear tank assembly (front view)
Front/Rear tank assembly (rear view)
The front and rear of the tanks are identical in the basic assembly, but there are a few additional details that come at the end of assembly. The base is composed of one piece with a large hole to frame the aluminum can. These are etched so that you can see where the face of the tank gets added. As you can see in the front view, the is a hole with an etched octagon for the detail pieces. There are a few options for to differentiate the front and back. For each side there is an octagonal extension piece, there you have the option of adding a fly wheel, a cap, or an access port to the front/rear as you like. I have chosed to have an access port on the front and left the rear open for the scenery build. The bottom of the face has cut outs for the support structure. To make the support structure identical, a single support structure component is applied to the back of the can frame.

Base and final assembly

Base with rear of tank storage attached
The base is well designed to hold the front/rear tank supports with one additional support piece for the center. This is a cut out similar to the front/rear supports. I put the rear of the tank in first and the middle support piece. I added a bead of glue to the interior of the rear support (not pictured) and the middle support where the can is seated. I also I then placed the can into the structure and with a bead of glue in the front of the tank and on the front support completed the tank assembly.

Assembled tank storage unit (front view)
Assembled tank storage unit (rear view)
The top hatch or the stairs/walkway can be added next. The assembled stairs/walkway fit neatly into the cutouts at the rear of the tank. The top hatch sits very cleanly on the fuel tank with the arched bottom. Signage is available with the flammable sign triangle, which can be added to the front/rear or the tank and the Caution signs, which I have added to the front/rear.

This is a great kit and one that will provide you with additional areas of cover, allow for height and will greatly add to your tabletop. While I am using this for promethium storage in a WH40k setting, this is easily used as an oil tank or fuel tank for any modern/future gaming scenario.

Tuesday, April 7, 2015

Geek Nation Tours - Day 1

Geek Nation Tours - AdeptiCon 2015

Day 1, Wednesday March 18 - Welcome to Schaumburg, IL


Teras Cassidy and Me
This was my first trip to AdeptiCon, but luckily I was joining some friends who have been multiple times and was facilitated by Geek Nation Tours (facebook). This was also my first experience with Geek Nation Tours and it was excellent. Teras Cassidy has put together a fantastic tour organization and helps with all arrangements including hotel stay, food, transfers from/to the airport, flights, Adepticon registration, and meeting lots of great people in the industry. 

I was lucky enough to have some sage advice from friends and since I was flying, I didn't pack everything I owned for the weekend. This, as it turns out is a really good thing, because what I did pack was too much. I packed up some of my Victorian Guard, which I had plans to paint, but then never did. I packed up my Star Wars stuff, but then never played. In fact, I ended up only playing two games, but more on that later.

I got to AdeptiCon (hosted in the Renaissance Schaumburg Convention Center Hotel) the day before the convention. While watching my Facebook and Twitter feeds, I noticed requests for help setting up some of the vendor booths. Now, as a reminder, AdeptiCon is very small even with the recent years of growth. I wandered down to see if Secret Weapon Miniatures needed help, but they were pretty much set. Then I wandered around to get a feel for where everyone was going to be stationed and when I went around the corner, there were all the good volunteers packing AdeptiCon swag bags. I figured, I was going to get one, so I could pitch in a bit. 

After about 10 minutes of packing, this cheery English bloke pops up next to me to pitch in as well. That bloke was Andy Chambers. We finished up the packing, received an incentive for our hard work ($5 off DSG games miniatures and a $10 voucher for concessions) and when all the bags were packed just stood there. Now I knew that later in the week, Andy was to be having dinner with us as one of the Geek Nation Tours events, but I am an opportunist. I asked Andy what he was doing and then we went to the bar to meet up with the rest of the group. 

Ironheart Artisans Blast Template
Well here are some other benefits to booking with Geek Nations, we got our registration done by Teras and that meant that we didn't have to wait in line for registration. You can order drinks from Sal's Beverage World and they miraculously are waiting at the hotel when you get there. I picked a case of Murphy's Irish Stout and a case of water. We also received some great Geek Nation Tours swag, including a branded long-sleeve tee, an Ironheart Artisans 2"inch blast template with markings for a 1" blast as well. Alex has done lots of other branded templates and objective markers, if interested definitely check them out. The latest and greatest is the add-on sets for Mantic's deadzone Kickstarter

That evening, we had our first Geek Nation's dinners. This was in the hotel and was, overall, pretty good fare. Following dinner and a plethora of announcements, we played some Warhammer 40,000 RPG. I had the honor of playing with some great folk in a Horus Heresy setting with guest GM Adam Fasoldt of Masters of the Forge (facebook). While the original idea was we would be a dinner and during the evening become acolytes, it turns out that an untrained psycher can easily unleash enough craziness that we were clearly heretics. The game was lots of fun and especially heretical, but in the end we all managed to escape alive though barely and I'm not really sure actually alive.

Final AdeptiCon haul
During the 40k RPG event, we also received our AdeptiCon swag, which included an AdeptiCon pint glass, AdeptiCon t-shirt, 10 tickets for the AdeptiCon Charity Army Raffle, and a load of armies and other gaming pieces.I'll have plenty of additional log posts to cover all of the loot I got as I get through assembly and painting.

How could it get any better than beers with Andy Chambers, well the convention hasn't even started (and we had lots of beers with Andy Chambers).


Hope to you see you at the next AdeptiCon,
Chris