Showing posts with label davetaylorminiatures. Show all posts

Sunday, September 4, 2016

Farewell Mighty Warriors...

This Is Not A Test Peacekeeper Warband


NOVA Open Lot
As this posts, the NOVA Open came to a close. With it, the NOVA Open Charitable Foundation Silent Auction will also be closing. Attached are a couple of photos of the auction lot, which included the first ever released hard back rule book, a Gas Mask Girl sticker, the quick rules hand card, and the Peacekeeper warband. My sincere thanks to Dave Taylor of davetaylorminiatures for getting these great photos.

Peacekeeper Warband Close Up
I am hoping to find out who wins the auction and if I can will see what sort of commentary I can get from them about the warband and the rule book. I do know that this lot helped the Silent Auction totals come to nearly $5,500 raised for the charities which is about twice what was previously achieved.

I imagine that most people who are reading this either supported the Kickstarter or will be getting the rule book otherwise. Those Kickstarter items will be shipping as soon as the miniatures start arriving. Keep an eye out for your delivery!

Dragonforge Designs Kickstarter Update

Free to backers at $1100 funding!
With just 4 days to go, the Oakk - Wood Floors campaign is moving along, albeit begrudgingly. These are fantastic bases for any campaign. I have a warband of Brigade Games miniatures that will be based on these miniatures as soon as I can get my hands on them. The details on these miniatures is fantastic, with rich wood grain, wearing, and tiny details, like nails!

These bases are fantastic for Guildball players and anyone who has a water's edge, pirate, or western themed warbands or characters.
On the horizon at $1300 funding!
As I write this post, the funding crossed $1,100, Coming quickly at the $1,300 funding level is the heroic set of bases. These had some really great looking flooring contrasts. These are really great for a variety of steampunk themed miniatures, but work great as the top decking for steamships, airships, or interiors. I imagine it might also be good for many of the Wyrd miniatures.

Other ways to stay in touch...


For everyone who has taken the time to read this, thank you for your interest and support. If you want to see other content, then you can find me on Facebook, Twitter, and Instagram as well.

If you have a blog or Facebook artist page or other things, feel free to post in the comments. I'd like to tag along with what you are doing. 

Wednesday, November 18, 2015

This Is Not A Test: Marshal's Report: Search and Recovery Operations

The following are the Marshal's reports of recent occurrences of peacekeeper activity from events at or near to Games & Stuff in Glen Burnie, MD. All reports are provided directly from the surviving ranking officer and are considered accurate and true. 

Marshal's Report


Search and Recovery Target - Relic Vehicle

Unexplored Ruins - Search and Recovery

Reported by: Marshal O'Halihan
Date: October 21, 2086

Unit Details

Marshal O'Halihan
K-9 Handler Mutt
K-9 Units Dawg & Cagney
Officer Manny
Officer Flynn
Officer O'Brien
Officer Scullin

Activity Report

During some downtime in one of the regularly patrolled settlements, the Gardia were approached by a wild haired, rambling, older gentleman dressed in some sort of laboratory coat with an offer. He stated that he had located a relic, but was unable to recover the item and was looking for a group to recover the item. The item, a relic vehicle of some import, was located about 2 km to the west on a long-abandoned small town main street. Marshal O'Halihan agreed on a price and accepted a contract from the gentleman.

Mutants pressing through the ruins
Because of the number of buildings located in the area, Marshal O'Halihan utilized a spread formation to approach from two separate directions. Sniper Manny, Officer O'Brien, and Officer Scullin approached from the northeast corner. Manny had previously scouted out a ruined building that he could use to provide support fire so the officers could approach and secure the relic.

At the same time, Marshal O'Halihan approached from a small copse of trees on some small hillocks with K-9 Handler Mutt and K-9 units, Dawg and Cagney. Supporting the, was Officer Flynn. The approach was a funnel, but offered some higher ground where Officer O'Brien and Dawg could provide cross fire with Sniper Manny.

Gardia securing firing arcs
Not long after starting the approach, Sniper Manny noticed a lone caravanner approaching from a distant heavily wooded area in the southwest of the town. When he was able to get the caravanner in focus, he was able to identify him as Sven of Killee's band. With a quick shot, he caught Sven by surprise and was able to send him scrambling for cover. After this an additional caravanner made a hasty approach toward the location of the relic vehicle.

It was quickly apparent that Killee's caravanners were in the area for the same reason as the Gardia, to recover the relic vehicle. As with many things in the wasteland, success is not guaranteed and as insurance the old man had hired another group.

Caravanners moving to secure relic
Mutt sent the K-9 units forward to engage, but when Cagney went to spring from the wooded hillock, she was wounded and could not go further. The set of mutants that Killee picked up a few weeks ago quickly moved through the ruins to try to secure the vehicle and make off with it. Marshal O'Halihan was able to quickly mark the mutant, Stop, and put him out of action. At the same time Officer Flynn caught Pots with near-hit and sent him scrambling for cover.

Quickly the rest of the caravanners made headlong for the relic in an attempt to overwhelm the smaller Gardia force. Sniper Manny was able to quickly put Sven down in the woods to keep him from the engagement. The other officers, Scullin and O'Brien made approach to the relic through the ruins to create firing arcs to prevent the Caravanner advance.

Gardia approaching through ruins
Marshal O'Hallihan and Officer Flynn took up locations at the tops of the hillocks to use the tree coverage and provide additional firing arcs to prevent Caravanner advance. Marshal O'Halihan was able to quickly Ms. Perfect as she returned fire from the corner of the ruined building. Marshal O'Halihan proved a better shot and put Ms. Perfect down. Killee opened up on Officer Scullin with her submachine gun, but none of the three shots were sufficient to penetrate the officers armor.

The caravanners continued the all out press toward the vehicle, taking up second story positions on the building at the southwestern corner at the vehicles location. Marshal O'Halihan took advantage of the close proximity of the caravanners and was able to quickly hit Mrs. Argyle, Swifty, and Mr. Flash. Where Swifty was wounded, the other two were downed and out of the engagement. Officer Flynn was able to put a shot on Mrs. Stuffings, but it was just a grazing shot and she went to cover but was not wounded. ant
Gardia eliminating caravanner rush

Officer O'Brien was able to keep Black Widow pinned down in the woods to keep her out of the engagement while Sniper Murphy was able to eliminate the mutant Pots that previously fled the engagement. These last actions effectively eliminated the potential for the caravanners to continue the engagement and with the loss of overwhelming numbers and at a tactical disadvantage, Killee withdrew her group and abandoned the vehicle. The Gardia cannot determine the nature of the vehicle as it appears to be some high technology that would risk obliteration if activated. If that was even possible still.

Post Activity Update

Midpoint Algoryn AI Squad Figure
When the Gardia salvaged the Depend O'Bot ($6.50) in the Wasteland encounter, I immediately purchased two from This Is Not A Test. But with the combination of personal things and pre-registration for AdeptiCon 2016, I went back to the Liber Metallica Seminar with Dave Taylor I had taken. With this seminar, we received a Warlord Games Gates of Antares figure, specifically one of the Algoryn AI Squad figures ($32.00 squad of 5 metal figures). This seemed like a good figure to use and it had the bonus of already being assembled and primed.

I decided to implement the Liber Metallica method with this figure so I started with by coloring all of the metal components with Vallejo Gunmetal Grey. This was the darkest of the gunmetal type paints that I have. I followed this immediately with a wash of Secret Weapon Miniatures Soft Body Black Wash ($2.99). Now one of the important aspects of this method is to repeat color with washes to change the tone color up and down as you go, remembering that the light is coming from above.
Finished Algoryn AI Model (Front View)

I tried very hard to keep the color scheme to a very limited palette. To deepen the spaces between the armor plates, I lined with Vallejo Black Ink. The cables were painted with Vallejo Black Grey and then washed with the Soft Body Black again. The gun was based with Vallejo Black and then there are touches of Vallejo Tinny Tin to give it a little pop. Who doesn't want a gun with a little pop.

Finished Algoryn AI Model (Rear View)
He has a series of belt pouches and a jet pack on his back. I decided to give these a little color to break up all of the shades of black and grey. The base color for the pouches and backpack was Vallejo Dark Red. This is a really flat red and not really dark or deep. I layered above on the elevated surfaces of the backpack with Vallejo Flat Red. The vent for the jet pack got some touches of Vallejo Gunmetal Blue to give it a little of the heated metal look. The belt pouches were limited to the dark red. I also gave some touches to the face and the emblem on the shoulder pad with the dark red.

Now all of this didn't provide any highlights on the figure. To achieve that, I went to the Citadel Chain Mail. This is a lighter silver color. I applies this to the exposed surfaces of the figures, trying to imagine those parts that would get the most light and therefore be the brightest/most reflective. While it is entirely clear that I need some more work on tackling this technique, I am happy with the results and this will make a nice addition to the Gardia.

Achievement Unlocked!

Bronze Bombardier Award
With all of the goodness at Bombshell Miniatures, it hardly seems appropriate to get recognized for supporting them. Last week though, I received an unexpected package from Bombshell. Inside was great looking pin and with a certificate indicating that I achieved the Bronze Bombardier Award for my continuing level of  support. In addition to this was a very nice hand written note from Patrick Keith thanking me for my continued support and help with spreading the good word on his materials. So my thanks to everyone at Bombshell Miniatures for the great stuff they produce and I look forward to the challenge of achieving Silver and Gold levels!


Sunday, November 15, 2015

Liber Metallica with Dave Taylor

AdeptiCon Seminar - Painting Metal

Extreme Range from Light to Dark
With AdeptiCon 2016 fast approaching (pre-registration starts 11/23) and a recent win in This Is Not A Test landing me a free Depend O' Bot ($6.50), I wanted to finish a post I started after AdeptiCon 2015. If you find yourself at a convention that offers seminars, you should take a hard look at them. Many conventions find amazing talent to provide a wide array of seminars or hands-on experiences to gain new skills or to see the approach the instructor takes. In this instance, I took Dave Taylor's Liber Metallica seminar. (While you are on Dave's sight, be sure to check out his latest project - Building a Titan, a Legio Crucius Warlord Titan) As it happens, this will be offered again a few times at AdeptiCon and if you have ever painted up figures, this is a helpful course. Though the focus is on metal figures, there are important discussions that cross over to any miniature.

Top Lit Bronze Statue
The basic premise of the course is understanding how to work on a model from the top down to provide the right lighting scheme for the model. During the course, Dave took us through some basic concepts of lighting and used a fantastic slide deck of images that demonstrated what he was saying. For each image, we walked through the image itself and the lighting of it as well as dissecting the color range/spectrum used as well as the color palette used. Not being an art major or aficionado, this was very helpful to me to learn more about color theory and spectrum. If you don't have a color wheel, it is a good investment if  you plan to use color theory for your painting. 

One of the main take aways from the class is to prepare the lighting from top to bottom. As if the light were coming down from above the model. As Mathieu Fontaine says light to dark from top to bottom. Matt works in spheres. Think of a sphere where light is on top, The brightest spots are on top and the darkest is underneath. If you break your models down into spheres and manage light/dark in the same manner for each section the end will capture the same lighting effect though the entire model. The bronze statue image shows this well, where the light source is from the top so the peaks at the top are the brightest then transition into midtones and darker tones quickly. 

Garden Sphere Sculpture Vatican
With highly polished metallic it is also important to recall that the metal should reflect the environment around it. To accomplish this, use shades on metallic surfaces (polished steel/silver) to reflect environment. Shadows of bright/polished metals will have shadows hued from the environment. In the image below of the sphere sculpture, you can see how the super high mirror finish of the silver sphere reflects the surrounding environment entirely. Even with this highly colorful sphere, you notice that the top is essentially white where the light strikes the sphere and the bottom where the sphere touches the garden goes to nearly black. 

Liber Metallica Miniature
During the seminar, Dave does specific coverage of painting steel/silver, gold, and bronze finishes and you get a chance to practice this painting style on a miniature. For the practice miniature, we got a great robot soldier model, I don't recall the producer. I have had this model sitting around since AdeptiCon 2015, but not taken the opportunity to paint it up fully. After a recent This Is Not A Test game where I managed to recover a Depend O' Bot in the post game and the upcoming pre-registration (I'm already registered through Geek Nation Tours), I saw a great opportunity to finish this model and post up about Dave's seminar. 

Liber Metallica Miniature
Unfortunately some unexpected events have occurred over the last couple of weeks which has prevented me from getting much painting done. The facility my wife was running was sold, which was not unexpected; but the sale was delayed twice and she ended up with lots of requests that kept her at work for 2 straight weeks. Add to that death of my grandfather and not much painting got done. I expect all of that to change very soon though and to see lots more production again. 

Seminar Bonus: Dave provided to us his super secret metal wash in a handy dropper bottle. And because he is such a great guy, he gave us the super secret metal wash formula as well. Dave uses this wash for a wide variety of applications, though large metal is a different process. I may attempt to take that class during AdeptiCon 2016. The exact details of the wash are missing, but you can play with the volume of each to get the desired wash you like.

Supper secret wash
  • Charred brown
  • Vallejo black (game color)
  • German camp black brown (model color)
  • Water and matte medium

Wash over metallics can dull sheen. Go back to highlight to bring back up to desired level.

Bonus tip: For items such as gems, sensors, and lenses; paint them up using the above described process then use layers of successive coats of gloss varnish. When you reach the desired level of shine on the gems, stop. Make sure to allow the varnish to dry completely between each layer.

Sunday, October 25, 2015

Trick or teat or your head HAHAHAHALLOWEEN SPECIAL

Halloween Special - Reaper Bones Gauntfield


To celebrate Halloween or All Hallow's Eve, whichever you prefer, I decided to paint up a figure I've had sitting around for some time. Let's take a look at the Reaper Bones Gauntfield ($2.99) which I decided to base on one of Secret Weapon's Field of Screams base sculpted by davetaylorminiatures.

Gauntfield bare bones
To start of course, make sure you give the figure a good wash with warm soap and detergent. I typically use  whatever dish soap I have at the sink.  As with all of the BONES that I have painted, my first paint choice is Reaper MSP HSD paints, but I don't have them all and so readily reach to my Vallejo Game Color and Army Painter paints. I apply the first layer of paint directly without a primer coat first and without watering down. There have been lots of discussions of other techniques on the Reaper forum, so check that out and find the method that will work best for you.

Base colors
I started with some basic colors to the figure because I seem to now be obsessed with Gotham and happened to be watching the mid-season Dr. Crane/Scarecrow episodes in season one and got inspired. The skeleton of the figure got a base coat of Reaper MSP Tusk Ivory. The face and straw were initially painted with Vallejo Game Color Khaki. The eyes of were first painted with Vallejo Model Ink Red. To this a pupil of Citadel Undercoat Black. The entire face was given a wash of Citadel Athonian Camoshade.

You may have noticed that the base also was not primed, which is unusual for a resin base. I decided to attach the figure directly to the base, which was done with a combination of green stuff and Kragl (Krazy Glue). The pumpkin is painted with Reaper MSP HSD Pumpkin Orange then washed with the Vallejo Brown Wash. highlights with Pumpkin Orange was added. To make it look like a Jack O'Lantern, I painted the inside with Vallejo Red Ink, then mixed up some of the Flou Yellow with the Pumpkin Orange to add depth until the area of the candle was with the pure yellow. I kept this small and muted so the focus stayed at the top of the miniature.

Starting highlights
The sack was base coated with Army Painter Leather Brown. After painting up the skeleton in the sack and the pumpkin, I washed them with Vallejo Brown Wash to quickly give some depth to those parts. I followed the same color pattern for the rest of Guantfield's bones. After the wash was set, I used a layer of Citadel Bleached Bone as the highlight.

The pants were painted with Vallejo Game Color Grey Blue. This was then washed with Vallejo Model Color Blue Wash. The belt was painted up with Army Painted Leather Brown and small skull buckle was painted using the Citadel Nihilakh Oxide. Typically you would use this on top of a silver to make it look aged, but the small size of the skull and the fact that most of my paint got spilled once so it was thicker than normal, made it perfect for this.

The boots were painted with Vallejo Game Color Grey Black, then washes with Vallejo Dark Grey Wash. I went back over the boots with a highlight of mixed Vallejo Grey Black mixed with Reaper MSP HSD Concrete Grey at about a 1:1 ratio. The shirt started with a base of Reaper MSP HD Off White, then a wash of watered down Reaper MSP HD Woodland Brown.

The cloak was first painted up with Army Painter Color Oak Brown. This was a bit darker than I had originally anticipated. To tone it down, I created a wash out of the Oak Brown with the Vallejo Dark Grey Wash. I wanted to give it a weathered and beaten look, like it had been out hanging for a long time. To bring the highlights up, I used a mix of the Oak Brown with Reaper MSP HD Ash Grey. I added a base highlight to the ridges of the coat, but it didn't bring up the color enough for the weathering. I added a little of the Reaper MSP HD Concrete Grey to the previous mix and again this was added to the highest parts of the coat.


The handle of the scythe was painted with Valley Model Color Mahogany Brown. I had considered adding a wash to the handle, then coming back over it with a grayish brown (probably Reaper MSP Ashen Brown), but it is 2:50 am and I don't have it in me to do any more work. The blade of the scythe was painted with Citadel Leadbelcher. To dull this down toward the bottom and by the handle, I went over it lightly with Vallejo Grey Metal. Then to give it the rust look, I applied the Citadel Dry Technical Paint, Ryza Rust. I am not sure if the depth of the color is sufficient or if it may need some additional rusting effect.

Odds and ends...the mouth was painted a base of Reaper MSP HD Golden Olive. This was touched up with a mix of the golden olive with Vallejo Yellow then touched up with just the yellow. The ropes were painted with a mix of Khaki and the Yellow. I think this covers most of it, but there may be more but for now, check out this information on Reaper's sale and Secret Weapons' sale and a big announcement from Reaper!

HALLOWEEN TREATS

Reaper Halloween Special
Reaper Miniatures always runs a great Halloween special, which I took advantage of last year. If you order before October 31 and spend tt least $40 you will receive four Reaper MSP Paints (Pumpkin Orange, Spectral White, Mouldy Skin, Breast Cancer Pink), one surprise miniature, and a bag of candy! This is a while supplies last, so get acting on it now! There is a huge stock of materials available including the new Bonesylvanians, plenty to get you to $40.

Sack O' Corpses
Secret Weapon Sack o' Corpses
Secret Weapon is running a sale for Halloween (through November 1) and this is your last week to take advantage. Take advantage of a 20% discount on sacks of pumpkins, corpses, and skulls and 20% off all Field of Screams beveled bases and Field of Screams round lipped bases. You can't go wrong with the corpses and skulls, I mean who can't use more skulls and take a look at the incredible details on the corpse parts.


BONUS MATERIAL!!! Reaper has just announced an entire line of BONES MSP HD PAINTS!!! The announcement was made yesterday on the Reaper Miniatures Facebook page. That's right an entire line of paints specifically designed to work with the BONES material. Many people have worked at getting the right paints or the right lots of paints that would work well, but now there is a better way. There will be 54 paints in the line and will be available in early 2016!

Sunday, October 11, 2015

Building a Titan, a Legio Crucius Warlord Titan build by Dave Taylor Miniatures

Dave Taylor Miniatures: A Production Studio

Legio Crucius Warlord Titan by Dave Taylor Miniatures

Background 


Dave Taylor has been wowing us for many years with his abilities be those in developing game content, modelling, painting, putting together articles and photo layouts. He has been a stalwart supporter of the NOVA Open Charitable Foundation with donations of time and energy to countless armies.
'Mars-Alpha Pattern Warlord Titan
Mars Pattern Warlord Titan

I've had the pleasure of knowing Dave for a while and what can I say he is a great guy and strong supporter of the community. I took the opportunity to take his Liber Metallica class at AdeptiCon which was fantastic. I'll be implementing what I learned there as soon as I get my act together.

Dave is looking to expand what he can do and provide for the gaming community. To achieve this goal, he has started a new and grand project to build and paint a Mars Pattern Warlord Titan. Dave will be exploring and experimenting with really powerful magnets, airbrushing, and creating/applying custom decals. He will share this process while also experimenting with a number of platforms including YouTube video sessions, Facebook posts, Instagram photos, blog posts, and Google Hangout chats. Some of these are entirely new areas for Dave, so we will be learning along the way. You can join along for the ride and help make this possible by supporting his Patreon campaign which you can read about in the Supporters section below.

The project is expected to take approximately 6 months, so you will get many insights to how someone of the talents of Dave approaches a build of this scale, selections of palette and process for painting large scale and detail. No doubt there will be countless and valuable tips for your own hobby work and with the level of interaction proposed by Dave, there will be plenty of opportunity to discuss everything in detail to increase the benefits for everyone.

So far Dave has posted up two great videos for the project with additional videos to be posted as he goes along. You can see more information about the number of posts and videos which increase as his support increases. I've included the first two video posts below so that you can take a look at some of the content that already exists and have an idea of what will be coming later.


The first video (above) is on the background and start of the project and includes a thorough unboxing of the many boxes included in the Forgeworld shipment. In the second installation, Dave covers the process for separating the resin pieces from the cast blocks including a walk-though of the tool selection, cutting and filing of mold lines. He goes on to handle how to process the pieces and prep them for assembly and painting steps.


Build associates


Fallout Hobbies
Fallout Hobbies - Ron Gamble at Fallout Hobbies has signed onto the build to provide custom decal sheets. I had the chance to spend some time with Ron at NOVA Open this year and picked up a few of his decal sheets. Not only does he have a great stock set of decal sheets, he will help you develop any custom set of decals for your personal or business use. I have a plan in place to have custom pin-up decals created, once I get my wife on board, for use on my air support. Prices are incredibly reasonable, especially for the custom sheets which come in at $35 for the first with the design help and then $15 per sheet thereafter. Definitely check out his site and support him as well. As a bonus if you become one of Dave's regular supporters Dave and Ron may help you design a custom set of decals for your use.


The Artillerist
Full Borer Miniatures - Chris Borer has signed onto this build and will be sculpting up a new crew set to man the Warlord Titan. This will be the second pairing of Chris and Dave and the previous match was for a NOVA Open Charitable Foundation army which brought us The Artillerist. The Artillerist was designed as the Master of Ordinance for the Steel Legion Imperial Guard Army that Dave painted up. I have this miniature and will one day get it painted up, but you can see the quality of this piece. For a fully painted version and more on the history of the piece, check out The Artillerist gallery.


Secret Weapon - I've long been a fan of the work done by Justin and crew at Secret Weapon. I spent a lot of the last AdeptiCon helping out at the Secret Weapon booth. I also took a weathering pigments seminar with Justin, which was really fantastic. Secret Weapon will be providing the base for this Titan Warlord. Need a base for any of your projects, well Secret Weapon has 875 different base options.

Supporters


This is not brought to you by the letter N and the number 5. All support is provided by YOU! and me and the rest of the gaming community.  This is a rather large project and as such will require quite a bit of time and effort and to help defer the costs of all of that, Dave has set-up a Patreon site where you can support the build.

In return for your support, you can get in on some great video blogging on the project and open communication about the project with Dave and the rest of the supporting community. Now this isn't your local PBS or NPR station, so no mugs if you support, but there are some great rewards for your monthly patronage. Here is the information for each level provided you support each month through the end of the campaign.

  • $5 - Name painted on the titan and a small decal sheet from Fallout Hobbies
  • $10 - Dave will help you create a custom Fallout Hobbies' decal sheet and the previous
  • $15 - Invitation to the bi-weekly Google Hangout and the previous
  • $20 - One Titan crew member miniature by Chris Borer painted by Dave and the previous

Now, I know you don't think it could get better, but it does. There are also monthly support thresholds built into the project. So if monthly patronage gets to

  • $300 - Increase to 3 videos per month and 6 blog posts
  • $600 - Increase to 4 videos per month and 8 blog posts
  • $1000 - Increase to 6 videos per month, 10 blog posts, and build a shipping crate for the Warlord!

Wednesday, October 7, 2015

MAIL CALL!!! Infamy Miniatures Welcome to the Big Smoke Kickstarter Delivery!

Welcome to the Big Smoke! 


After a long day of preparing for a Good Laboratory Practices audit by our potential client's independent consultant (I am a Quality Assurance professional), it was quite nice to see a wonderful brown box with a Royal Mail label. Now this was not expected and I wasn't sure what it was, but was sure it was some miniature fun.

When I opened the box, to my delight it was my Welcome to the Big Smoke package from Infamy Miniatures. Now I can't express to you how amazing the quality of these sculpts, which is also quite daunting since I will now have to paint them. So let's take a closer look at the pieces I got from the Kickstarter...well right after we take a look at the non-miniature stuff.

Postcards and dice


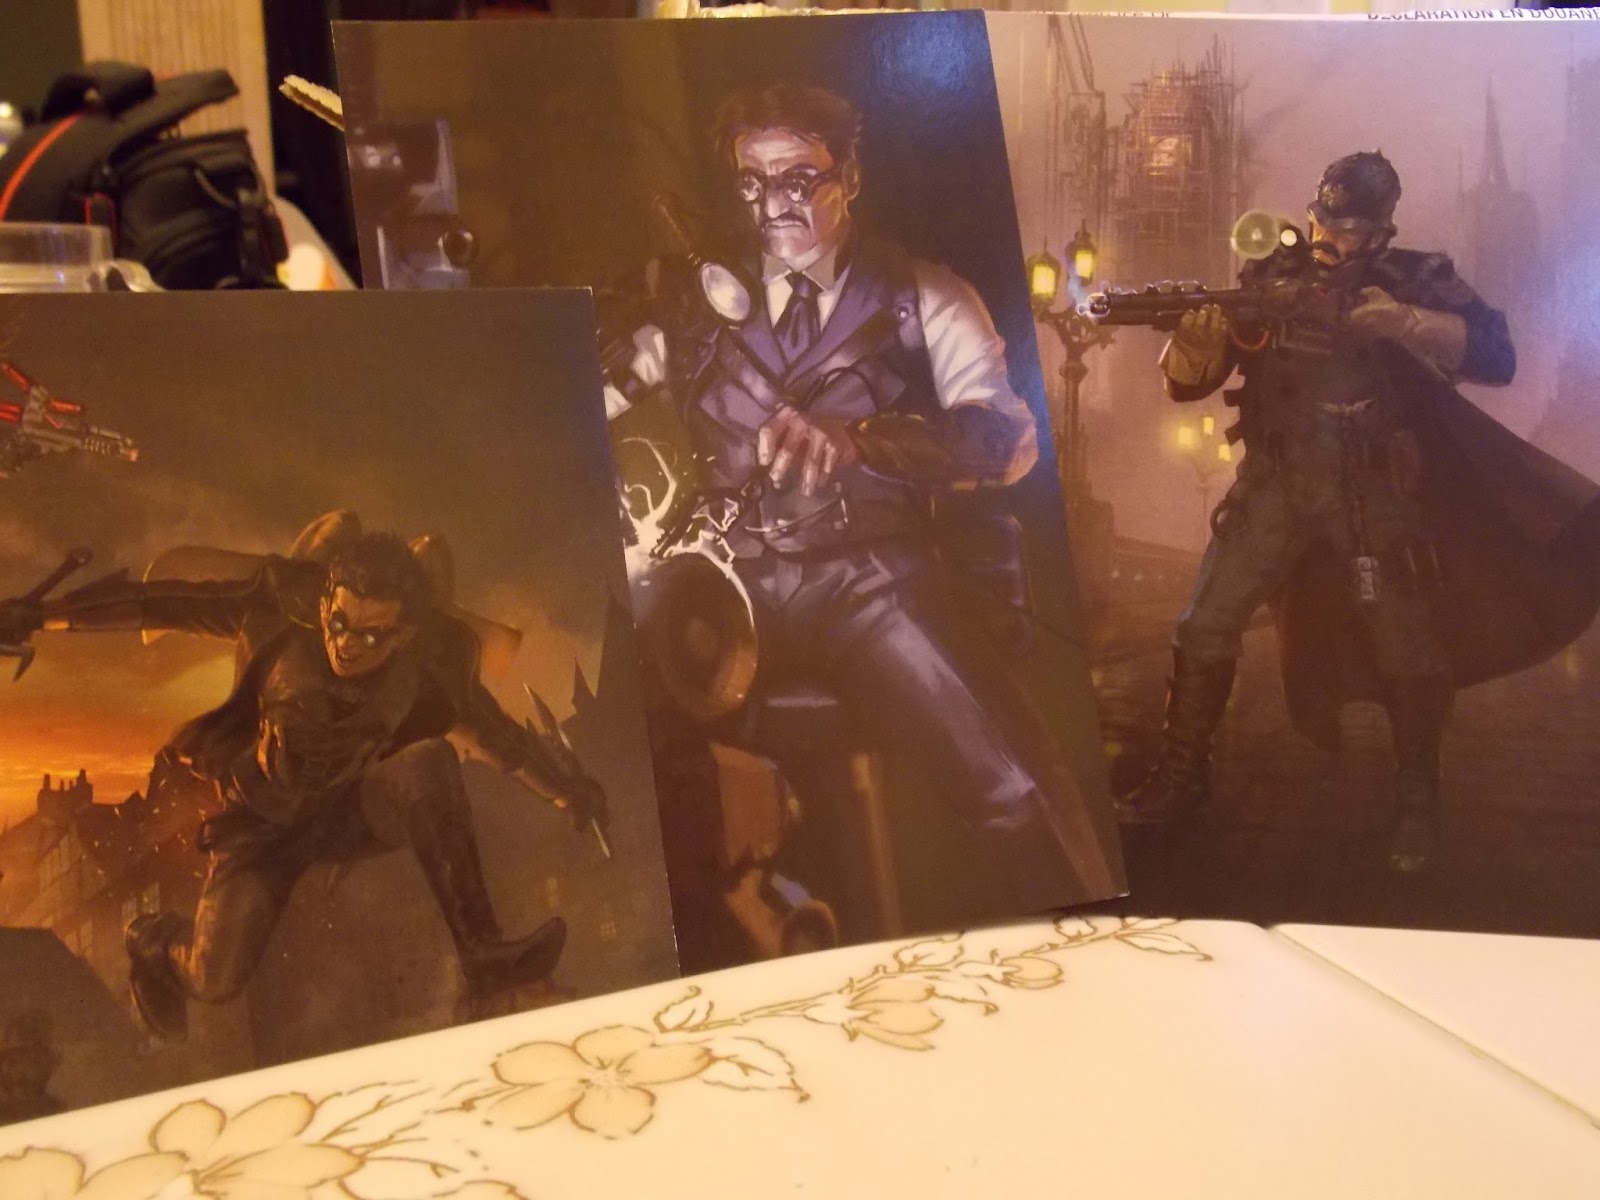
The first thing I wanted to take a look at were the incredible art postcards that were free with the Kickstarter Battle pledge level I selected. There are a total of ten postcards.

There is art for a very industrial Victorian-era London, a smog-laden city panorama. A shot of Uncle John hosting his Animal Circus from the London Zoo surrounded by Chee Chee and some of his chimp soldiers. Sherlock Holmes and Dr. Watson "interviewing" a figure on the street. Tesla sitting in thought amidst the ruins of the city with his Tesla Cannon behind him.

Henrietta Jekyll leading the outlandish Frank Hyde. The true American import, the March family loaded up with six shooters and rifles. We get Officer Crookes with the Tesla rifle taking aim. Tellulah Belle and Corvus moving wildly through the city. A lovely couple working in the kitchen making some fresh sausage...I only the spices are right, cause it may be the only thing that's right. And to finish out the set, the master himself, Tesla hard at work.
Infamy branded dice

To finish off the non-miniature materials included in the pack, were two Infamy branded dice. One was the standard clear die with the Infamy logo. The second was an opaque die with the Welcome to the Big Smoke icon in gold.

Miniatures 


 Well, let me first restate that these are some of the best resin sculpts that I have ever seen. I am kicking myself that I didn't pony up for the Full English pledge level. So let's talk about these miniatures.

Pigeons
Now it would not be Victorian London with out pigeons, I mean grab your tuppence and re-watch Mary Poppins if you have forgotten. This set of five pigeons was included with the pledge level. The detail is wonderful and there are a number of poses including one pigeon in flight. Now for me this brings to mind entirely new ideas for basing and for other games.

Harry "The Hat" Hallahan
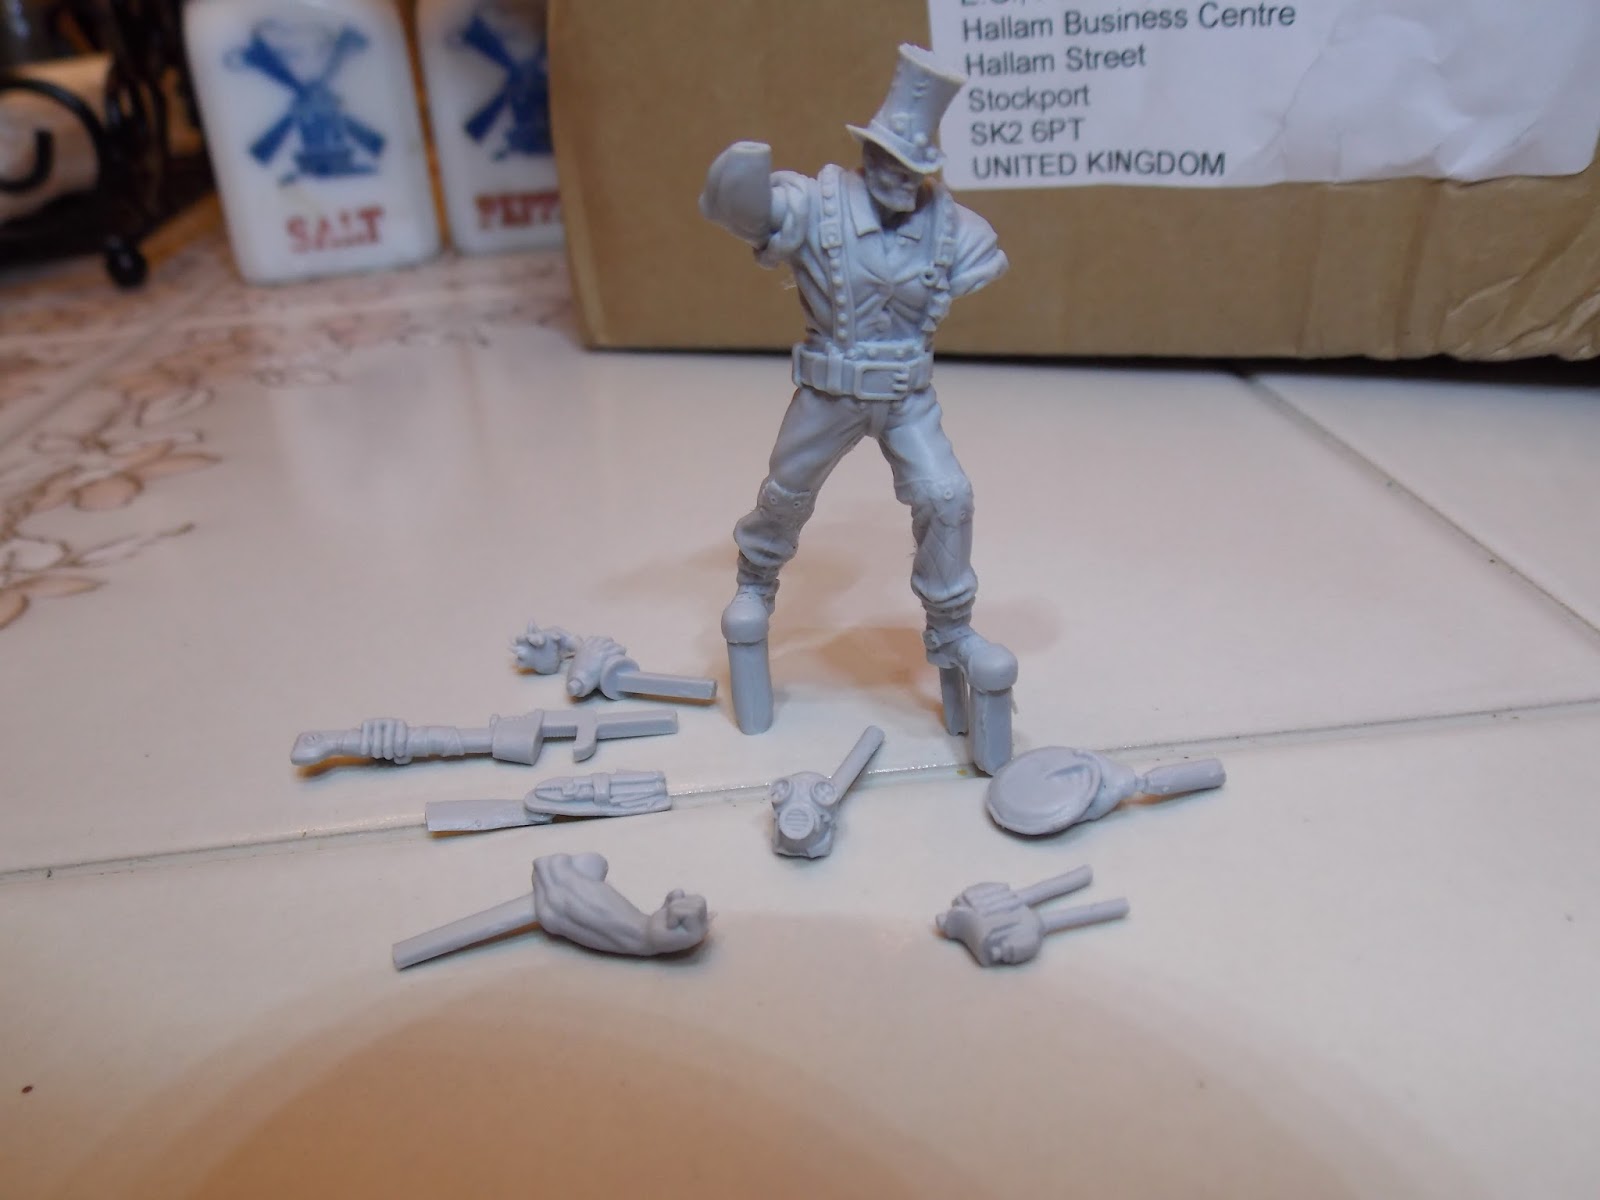
Harry "The Hat" Hallahan was one figure I knew immediately that I had to have in my collection.  Harry comes with a variety of weapons including a pie! He also has a wrench should you really want to knock someone about. Harry has a set of accents to fill out his work belt, including some

The Mole
When you see Mole, all you can say is, "Yes!" Not only does he have the perfect face for the figure, he is loaded down with a chest full of dynamite! He has a steam-powered pack that runs his digger arm and provides powers his massive hammer.

Frank Hyde
Now the Mole may have a massive hammer, but Frank Hyde is just massive. This new interpretation of the Jekyll and Hyde myth is truly imaginative. In Welcome to the Big Smoke, Jekyll is a chemical fueled monster that is under Dr. Henrietta Jekyll's control. He has a chemical tank backpack piped directly into him and is wrapped in chains, but it looks like he may have skipped leg day.

Mad Pete
Corvus is a high flying, debonair gentlemen. Well in this setting being in the jet set means being well armed as your fly about the London rooftops.
Tellula Belle

Pete's partner in crime is the every so lovely Tellulah Belle. Where Corvus is moving with a rocket-powered backpack, Tellulah has opted for flight from powered wings. The sculpt is incredibly well styled and detailed, right down to the laces on her knee-high boots.

The Toad
 Another heavy hitter, The Toad is well armed. Powered by a coal-fired furnace, The Toad carries quite the arsenal. His steam hammer is enough to crush any foe who gets close enough, which is not very likely considering the Gatling gun he also carries. While either is extremely powerful and dangerous, he is protected by his enormity and the steam harness that powers him.

Badger
Badger should be considered armed and very dangerous. While the body of the sculpt is fine and well detailed, the amazing part of this sculpt truly is in the augmented arms. Each arm is articulated with some external rods and give him a powered up punch.

Tesla
The world renown and frequently overlooked mechanical genius with the power to harness lightning, well electricity, Tesla is well equipped with a powered backpack that allows him to throw electricity. No worries, I am sure this is set-up for alternating current.

There are many more characters available to romp through London in Welcome to the Big Smoke. Hopefully I'll find my way to owning more of them as I manage to get these sculpts into the queue of painting and playing.

I didn't pick up the entire set of miniatures and there are plenty that I wish I had purchased. I am hopeful that as this moves forward, I'll catch up with them and in the mean time we will get to see some releases from davetaylorminiatures.

Sunday, August 30, 2015

You won't like the wasteland when it's angry!

This Is Not A Test Wasteland Hulk

Base Model


Reaper Bones Clay Golem
With more regular blog updates planned, I needed to come up with projects to complete. I thought to start with something that I could use for This Is Not a Test and coincidence has it that the Baltimore City Jail was closed this week, which I put together in my head for a project. I figured the one thing every nuclear wasteland makes is a gigantic hulking monster and where might one of these come from? A prison of course...so let's make a monster.

I have as stock selections the Reaper Bones I and II Kickstarter miniatures, which gives a few hundred to select as starters. There are a couple that may work as suitable base figures, but all would need to be adapted to some extent. I selected the Clay Golem (77170 $2.79), He simply had muscles on top of muscles which seems like a good mutation and one that would let you thrive as a hulking beast, potentially working under some gang leader.

Painting Process

Base Color
Recently, there was a step-by-step guide for a Librarian posted posted by Dave Taylor (Battle for the Craftworld - Painting the Librarian) that used a technique that I wanted to copy and it will work for this figure.

Base Color. As with all Bones miniatures, make sure you have washed it well with soapy and water before starting anything. There are plenty of posts on the Reaper forums about whether you should prime the miniature or not and what primers work. I have not attempted to prime any of my Bones. I started with a base color of Reaper MSP Sunburn Flesh on the entire miniature. Since I did not prime the figure, I just used the paint as it came. I had no issues with the hydrophobic nature of the Bones.

First wash
Depth. With the base color on the figure, I started to add the layers of depth to the miniature. There are lots of muscles, more than a typical humanoid and that creates lots of small spaces between the muscles. In addition to these spaces between the muscles, the larger muscles have some stretching to them that creates some extra grooves. Another complaint about the Bones material is a loss of detail. I have found that most of these complaints are because of the white color which makes seeing details hard. There are some smaller miniatures where the really fine details that were on the original metal version are lost, but by and large these are great figures.
I used the Citadel Devlan Mud Wash over all of the painted surface. The hydrophobic nature of the Bones is not an issue once a layer of paint is applies. I applied the wash liberally over the figure so a good amount of the wash would stay in the grooves and cracks.

Pants
Pants. After the wash was added, I realized that there was something significant missing from the figure. While it would have been fine with the small loin cloth bottom; it didn't hit the Hulk vision I had, I also did not think it wasteland enough. It also occurred to me that this would be perfect if this was the result of a nuclear radiation mutation on a prison inmate. Well to achieve the inmate look and to add some additional character to the miniature, I decided to add some pants. Well to be more precise the remnants of his prison jumpsuit.

Pants (Rear)
I used some Gale Force Nine green stuff to create the pants. Working is green stuff is still not something I have mastered, but as with all things more practice helps. I rolled out very thin sheets of green stuff since I wanted it to be close to the same thickness of pants. I actually woke up in the middle of the night thinking of this. I also wanted to make sure there was going to be some space between the pants and the leg.

Once the sheets were added, they were too long, so using one of my trusty dental picks, I started to cut off some of the extra. This worked out pretty well because the green stuff was just about 10 minutes old and very pliable. When I cut into it the green stuff stretched and pulled a little when cut which gave a great torn close look.

First Highlight
Getting deeper. I had to leave the figure overnight to let the green stuff set up and harden a bit more before proceeding. After about 12 hours, I started to add some of the up-coloring. I do not know if that is a real work or what the actual technique is called, but I started adding layers of lighter shades on top of the base coat. This is the technique outlined in Dave Taylor's Librarian paint job.

Second Highlight
I started by mixing a 3:1 paint mix of Reaper MSP Sunburn Flesh:Reaper MSP Suntan Flesh. I laid the color onto all of the muscle groups and any elevated surface. I applied this layer mostly to the top half of the figure, but did hit some of the exposed parts of the heel and ankle.

The next layer up was a 1:3 paint mix of Reaper MSP Sunbutn Flesh:Reaper MSP Suntan Flesh. For this, I tried to be a lot more cautious with the application. I started by adding to the top parts of the muscles and head and to the elbows. The second highlight made the entire figure look a lot like a painting of some sort and not all that natural because I did not do any wet blending. I would, but I don't know how. So to get this to look better blended, I used an additional wash of the Citadel Devlan Mud Wash. This took off the edges of the paint transitions and added some better shadow/depth to the muscle beds.

Finishing up. I, unwisely, did not follow Meg Maples' 6-Step Eye technique (blog post). As a result of not planning ahead, I had to use the magnifying glass to help me out (I really need a new contact prescription). I used the Reaper MSP Aged Bone as the base color for the eyes and an incredibly old Citadel Enchanted Blue for the iris. I didn't put in a pupil because I thought it made the figure a little crazier looking.

The pants took a lot to paint. Because I had to blend the color of the pants from the green stuff to the Bones materials and neither were primed, I used a bunch of layers. This just layer on layers of Reaper MSP Fire Orange to get a uniform color. The connection of the green stuff and the loin cloth of the Bones material was not perfect, so I used a very watered down Devlan Mud wash to the pants to add some depth/dirt and to cover up some of those areas.

Final Model (Front)
 The base was painted with Reaper MSP Ash Grey to give it the concrete look of the prison. A dry brush of a lightened Ash Grey. I got this by mixing the Ash Grey with some of the Aged Bone at about a 1:1.5 ratio. While this could have been a suitable finish, I wanted to do a bit more. I mixed up a yellow green color, but combining some Vallejo Game Color Flat Yellow with Citadel Goblin Green at about a 1:1 ratio. This went down as the base color for the toxic spill and was used as the nail color. Then a layer of the flat yellow was applied to the top of the toxic spill.

Final Model (Rear)
I attempted to use realistic scenic water, but there are not dips or anything to the base so it did not sit correctly. I had to come up with an alternate plan. I did not have any other model water materials, so I used what I had on hand, Citadel Plastic Glue Thick. This gave the right texture to the base and because of the thickness, it obscured the lines of the paint on the base and stayed where it was applied. The only minor difficulty was making sure there was no glue on the base that would make it adhere to the surface where it sat to dry.

I am happy with this model and the speed with which I was able to get it completed (48 hours). This has a lot less tiny details, but that allowed me to use a new technique which I appreciate. Looking forward to more Bones work for the wasteland bestiary.