Tin Roof...Rusted
 |
| Base Coat Applied |
 Each person was provided an unlimited supply of "tin" sheeting. We used coffee cup sleeves from Starbucks and WaWa. For those outside of the Northeast US and Florida, WaWa is a convenience store chain. These, when flipped inside out, have great corrugations that look closely like tin sheeting or even corrugated steel. The back side is of course smooth so it allows for easy application to other surfaces. Most of this sheeting was cut into standard width and length sections of either 4' x 6' or 8' x 6'. This was to replicate what would be easily found within a DIY shop or scavenged from other locations that were already used. Smaller pieces were then cut to fill gaps or to add texture to the pieces.
 The base and walls were made of standard foam core sheeting that is generally available for any kids craft/school project. I kept the walls to 8' (2") to allow a figure to stand within easily. The ceiling is not attached to make the inside playable. The door was created using a simple technique using stirrers. These happen to be Starbuck's stirrers because they are the right width and rectangular. Each door panel is cut to be 6' (1.5") in length. The interior of the door, is held with a series of four small pieces spanning across varies widths of the door.
  After priming this shack, I decided to test out a new can of Rustoleum Forged Hammered Antique Pewter ($8.66) that I picked up on a whim one day at WalMart. You can see the texture of the paint in the Base Coat Applied base. This is a primer and paint in one, so it will save you a step if you go this route.
 The weathering of the tin sheet was accomplished by mixing some Vallejo Model Color Light Grey areas and some Reaper MSP HD Dirty Grey spread around different areas. Some areas of rust were added using Anita's Metallic Tin Roof Rust. You can see this on the roof and some streaked areas on the front. Washes of Vallejo Model Wash Light Grey were added for sheets to add some depth. Model Wash Dark Grey was applied in areas of overlap or where a shadow was needed. The base was painted with Delta Ceramcoat Dark Burnt Umber as a place holder until I decide how I will incorporate into other pieces. This shack may be removed and placed onto a better MDF or particle board base.
In the end this painting test mostly worked. I ended up removing most of the beaten pewter from the start, but the base color was good and could be useful for some other models. In the next, I'll try a different color base and some other fun weathering ideas and break up with some broken color areas.
Dragon Forge Designs Medical Supply Marker
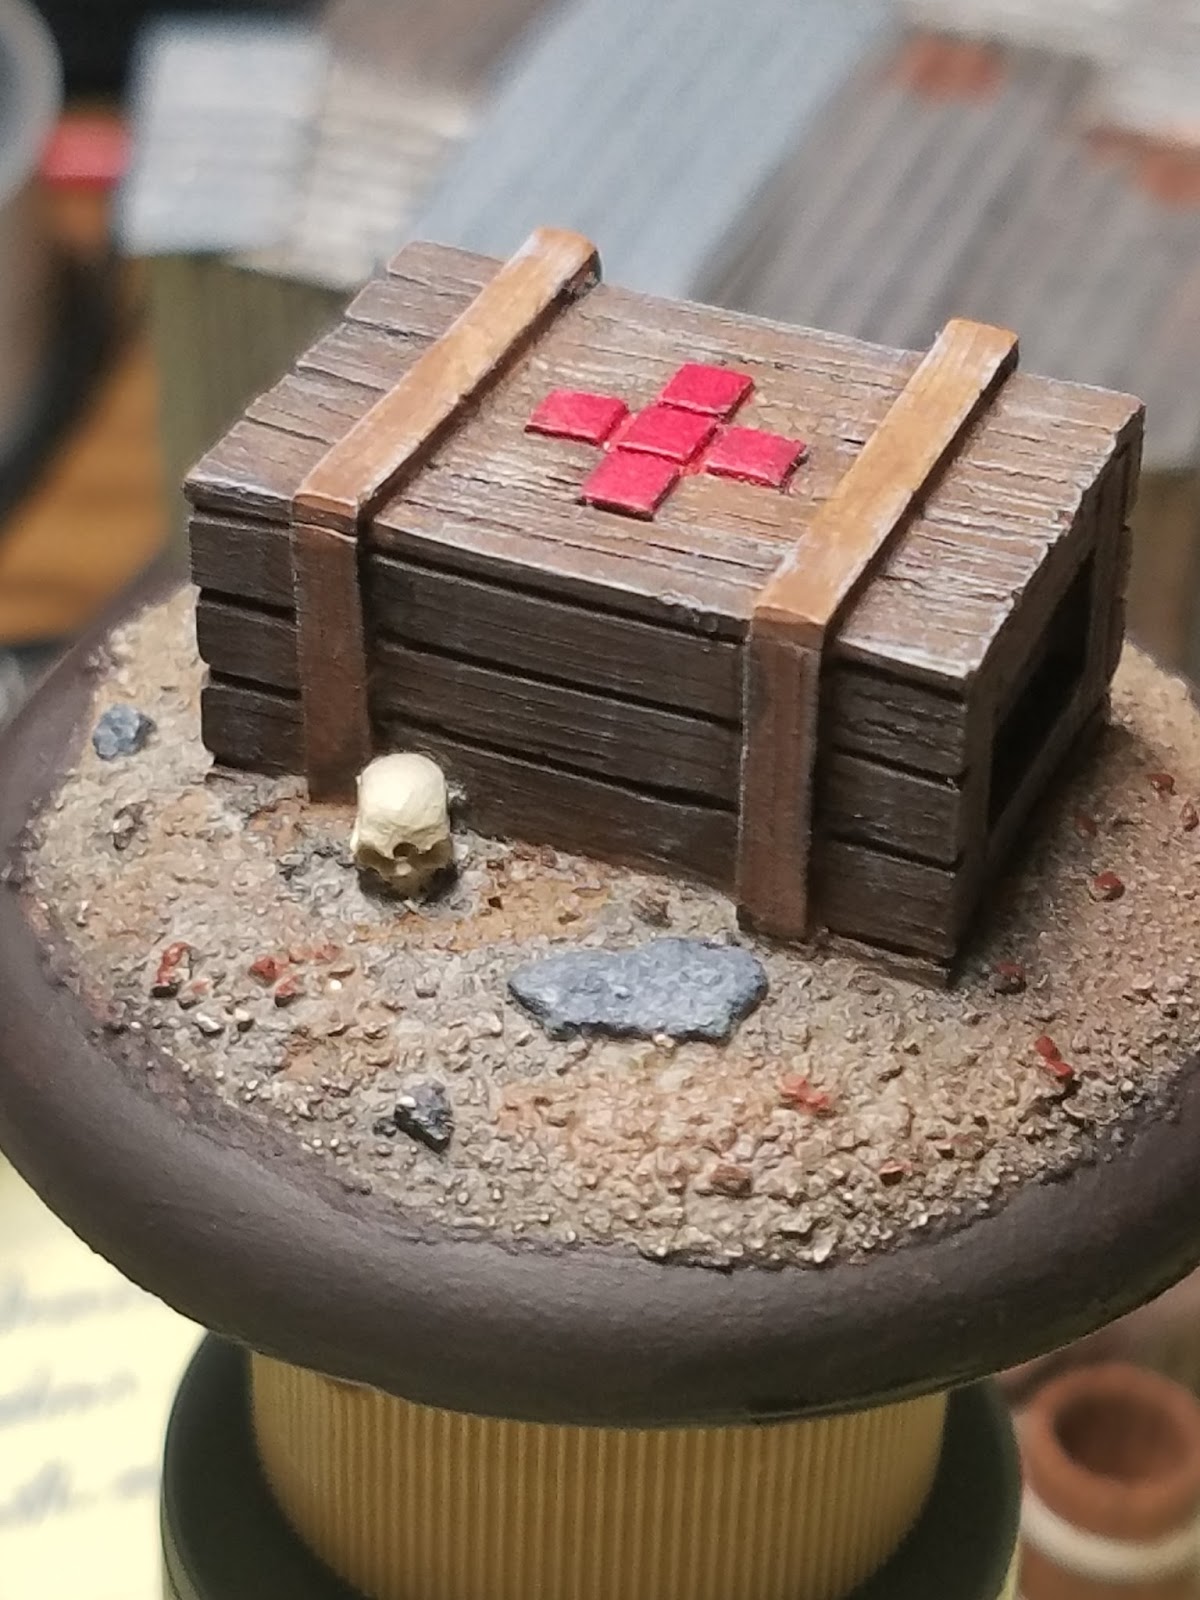 This Medical Supply Marker ($5.00) is the second of these markers that I have painted from Dragon Forge Designs. The first was a 40mm on a beveled base and covered in my Take a second to breathe...then prepare for what's next post, while this one is 50mm. As you can plainly see, this base is a rounded lip base, which is my typical preference for all of my miniatures. For this, I did some different things. I started with a base of Citadel Calthan Brown for the box. The cross members are based with a bit of Citadel Dwarf Flesh. The cross is painted with Vallejo Model Color Flat Red. The box was washed using Vallejo Model Wash Light Grey to draw out the grain of the wood. The box was dry brushed with Model Color Light Grey to add some aging to the box.
  The base was started in Citadel Bleached Bone as was the skull, but I found it to be too light. I painted a few of the larger rocks with Model Color Ashen Grey and some of the smaller rocks with Citadel Knarlock Green. With the light base color, the skull was lost and it looked too much like a sandy area and that was not the final location I had in mind. I used a Model Wash Dark Grey which took the base much darker. This was hit with a dry brush of Dwarf Flesh to add some highlight. Back into this some small areas of Calthan Brown was added for soil and some areas of Delta Ceramcoat Dark Burnt Umber. This Dark Burnt Umber was also used to trim the base entirely.
 Mantic Games Canister
 At some point a couple/few years ago, Mantic Games had an offer for some free scatter terrain pieces that could be used to support Battlezones or Star Saga. This specific one is a three canister set that is permanently attached. This piece was free, which is pretty great, but unfortunately I only have one of these. I'd love to have another 5 or 6 of them. You can now get these within the BattleZones: Sci-Fi Urban Accessories pack ($12.99).
 I went with a flat color scheme with a primary color base to give it a futuristic look. The base colors are Vallejo Model Color Flat Blue and Model Color Flat Red. The top is Model Color Grey Blue. The segments are lined using Game Ink Black. The side clasps were painted with Citadel Chainmail.
Now, for use in This Is Not a Test the canisters must be beaten up some. I used Reaper MSP HD Military Grey to make some areas where the color was removed and the primer exposed. In some of these areas, some slight use of the Citadel Chainmail is used to show the bare metal.
Dragon Forge Designs Ancient Runes II Ammo Objective
 The Ancient Runes II Ammo Objective ($5.00) is 40mm on a beveled base. This is a set of large ordinance shells and a smaller ammunition box on what could be an ancient tile floor space.
For the stones I wanted an aged Italian/Greek marble look. I started with Citadel Bleached Bone as a base. The marbling was added with Reaper MSP HD Tusk Ivory and Citadel Calthan Brown. I washed this with Model Wash European Dust.
 For the ammunition box, I had a desire to have a RoboTech inspired box. For this I used Model Color Blue Grey for the surround to the lid and Model Color Light Grey for the rest. This made is futuristic and I think hit the color intent. Of course this would stick our for Warhammer 40K and This Is Not a Test, but I like the look.
The shells are based with FolkArt Metallic Chocolate Brown, surprising I know but I have a big bottle of this stuff left from the Command Master Sergeant statue. This was then washed down with Citadel Nuln Oil to rough it up/age it and to pick out the section lines. A couple of highlights were added using Reaper MSP HD Military Grey.
gui hang quoc te. So good
ReplyDelete